This is my honest review of the Ecubmaker TOYDIY 4 in 1 3D printer.
Read the full transcript below if you prefer a written version.
Hello, my name is Daniel, welcome to the CrossLink channel. I would like to help you being more successful with 3d printing and if you're here for the first time, subscribe and hit the bell notification so you don't miss anything.
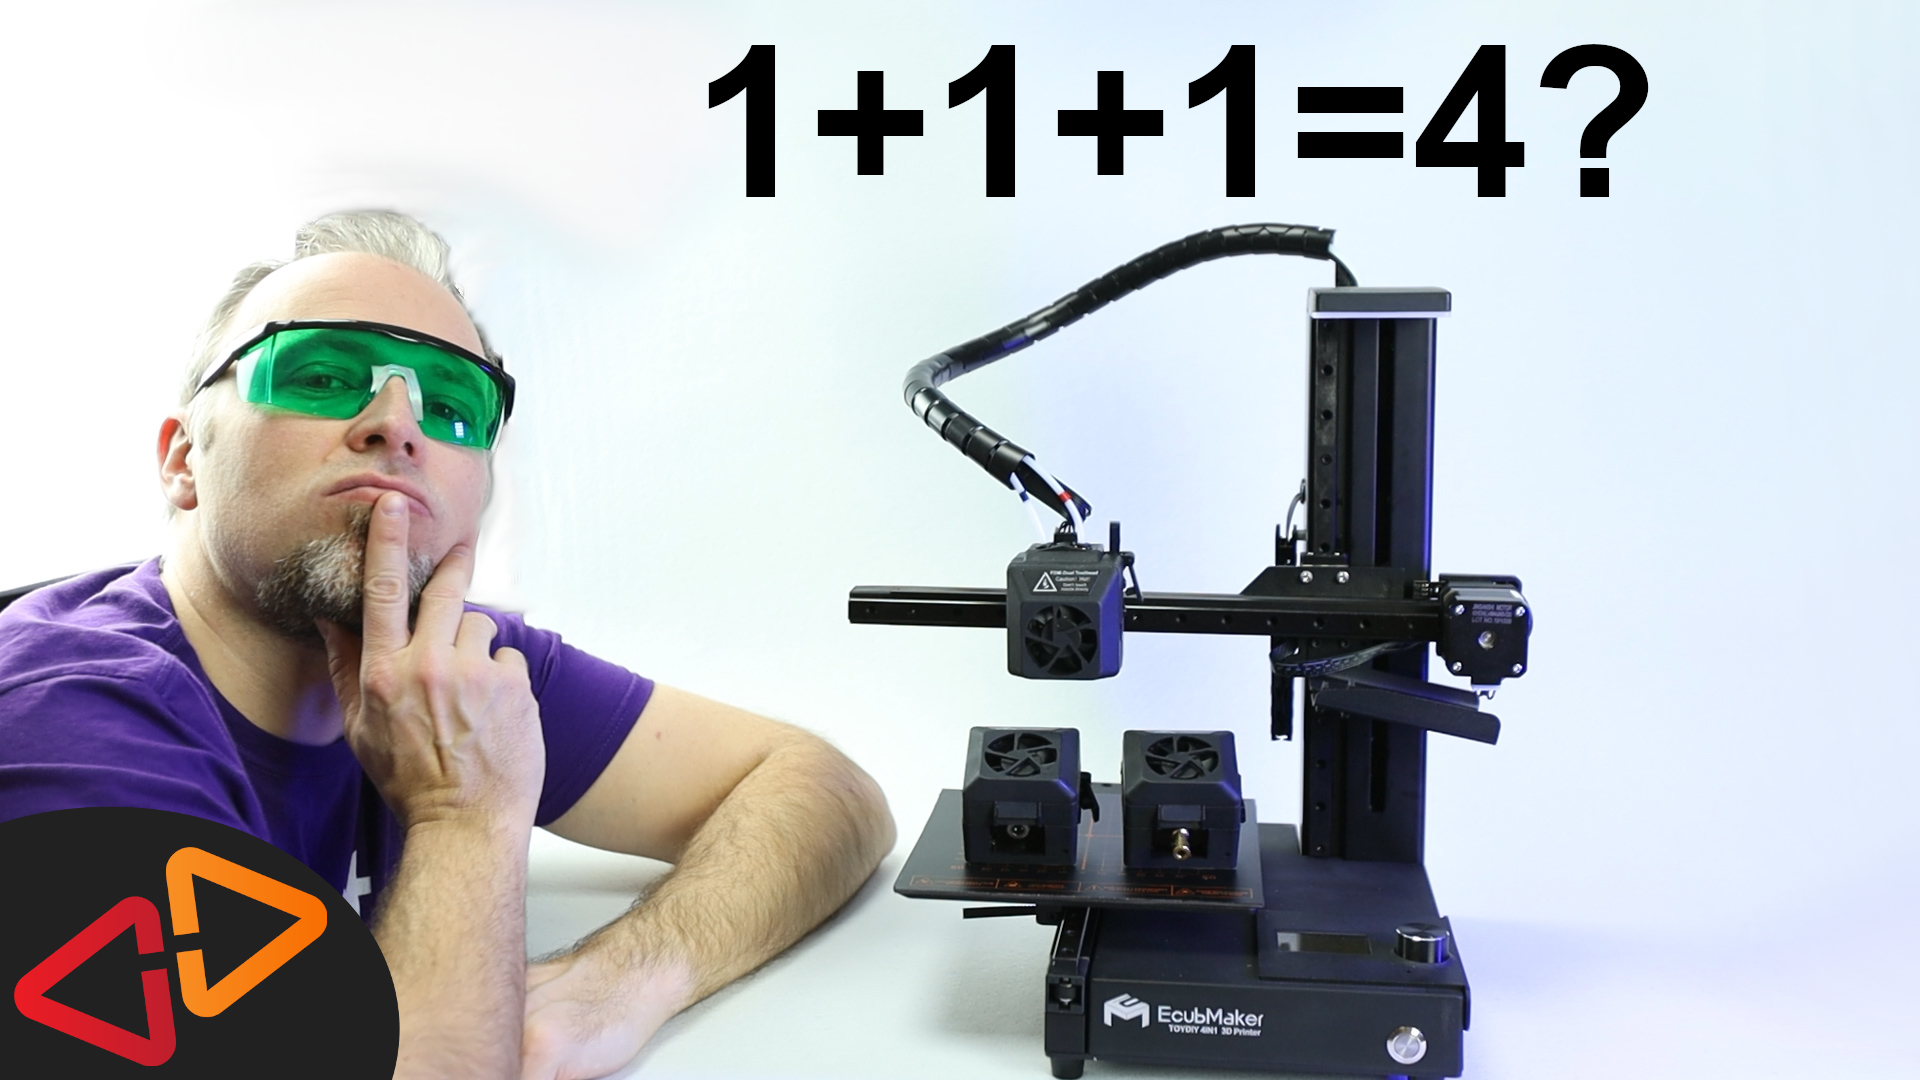
In the last couple of weeks, I had the opportunity test this little guy here, the EcubMaker TOYDIY 4 in 1 3D Printer, CNC engraver, Laser engraver jack of all trades machine. Thanks to EcubMaker, I did not have to buy it because they sent it to me for free. So this video is kind of sponsored but on the other hand, it's my honest opinions.
I've already extensively covered the unboxing, the setup, 3D printing - including dual color printing, CNC engraving and Laser engraving - in depth in two other videos of this playlist - so if you've missed them, check them out here.
Also don't miss the giveaway - this machine could be yours, if you don't forget to register for the giveaway at crosslink.io/free.
Now, let's walk through my final conclusions.
This device will set you back about 500 USD. And this also kind of sets the boundaries of expectations to have.
Having a dual color 3D printer and a CNC and Laser engraver in one machine sounds pretty tempting in the first place and if you would have to buy three individual machines for each purpose at comparable level of build sturdiness and quality - you would end up with a much higher price.
So from what I have observed when testing this device is that it does fulfil each individual job pretty well but it is also limited at the same time having only 180mm of build size in each direction.
Let's dive in a little bit deeper.
The 3D printing module is basically the "two" of the 4 in 1 functions, meaning, it can do single color 3D printing and dual color 3D printing.
If we look at the results, my first print wasn't going that well. I had to tackle some issues with belt tension, friction on the z-axis and the x-axis horizontal alignment with the print bed - before I could get out a decent result. I figured them out but it wasn't part of the setup instructions.
Then I managed to do a dual color 3D print, which came out pretty well and the way how EcubMaker designed the dual color printing module and especially the filament color change process using this slide here on the side and these rubber bumpers to strip of the filament - shows me - that a lot of thinking and ideas went into the design of this device.
I also like the ideas that went into bed leveling sensor deploy and retract mechanism, so it releases the sensor during the leveling process and retracts it when the actual print starts.
Remember - if you have a 3D touch sensor on your printer - in some occasions that needle can accidently deploy and cause issues like running it into a printed part - pushing that over the print surface - I even made a video about this.
Having a removable, magnetic print surface is also very much appreciated.
But at the same time I was scratching my head about why did they choose to go for this tiny, low quality display or why is this power and sensor cable for the heatbed so poorly routed and protected.
Let's continue with the CNC engraving. I did not have any issues getting that working and the result came out pretty much as you would expect.
You have to find the right distance however for your engraving drill, because auto bed leveling doesn't apply to CNC engraving. And this could also lead to issues when either the material thickness is not equal everywhere or the platform is not perfectly level.
Having said that - one thing that you realize when you look at the print platform - there is no bed leveling screws. So even if you try to align the x-axis bar with the bed surface like I had to do it - And I managed to do it pretty well - there is no way to fine tune the leveling with some knobs like on other devices.
But in the end using the CNC module was pretty much flawless. Also the overall design protects the electronics and mechanics very effective from any dust particles flying around.
Then coming to the Laser engraving - The setup there is almost identical as for the CNC engraving. I only discovered some issues with the z-axis being blocked by the hand screws that are supposed to fix the engraved part during the auto home procedure.
This should have been mentioned in the manual for sure. But when I got over these issues, by properly aligning the handscrews and removing the front right fixture - the rest of the process was pretty much flawless.
Someone in the comments of that last video mentioned that fixing the part to be laser engraved with double sided tape instead of the mechanical fixtures would be a better idea and I think this could actually work pretty well.
You would also have a larger area available where you can engrave. So you could really go to the edges of that part as well.
Another interesting detail is that Laser engraving makes use of the leveling probe so this removes any work for the user to align or focus the laser having the right distance to the engraving part.
The quality of the laser engraving is really good - only if you magnify the result quite a bit you will see the individual laser lines and dots but this is the nature of how the laser engraving process works and this will not be different with other machines as well.
Now, let's talk about the software from EcubMaker.
First, there is EcubWare, the 3D printing slicer software. This is mostly a branch of CURA with a printer profile for the TOYDIY 4in1 and also some additional features for CNC and Laser engraving. If you know how to use CURA, you will have no issues whatsoever to use EcubWare.
On the other hand, I was advised by EcubMaker not to use EcubWare for the Laser engraving, because they have a new seperate software that is called EcubMakerLaser just for that single purpose.
EcubMakerLaser seems a lot simpler and much better suited just for the purpose of laser engraving.
Basically all you have to do is select an image that you want to use. Then you can check whether the preview looks decent or if you would like to change the dithering algorithm, which basically determines how pixels are going to be used to render different greyscales.
Then you finally save the gcode file to your sd-card and laser it to your part.
Upgrading the firmware is also made easy by EcubMaker. You only need to download a software from their website that's called XLoader.
Then you plug in your USB cable to your computer, connect it to the printer and use that software to flash a new firmware release. Thanks for making that easier than other printer manufacturers do.
Ok, WHO is this device for?
I will say, if you are new to this hobby and you want to explore all the possibilites of 3D printing, Dual color 3D printing, CNC and Laser engraving and start getting some first results without a long learning curve - this machine is probably a decent choice.
Especially if you consider the price.
Btw. if you like to buy this device - I have a put a link in the description of this video.
If you already have a 3D printer and just wanna explore CNC or Laser engraving, probably another separate device is the better choice for you - also because you will mostly get a larger engraving area to work with.
If you like to get a chance to win this printer don't forget to register for the giveaway at crosslink.io/free.
If you like this video, please do me a favor. I appreciate if you hit the like button or subscribe to my channel - BUT - the real way, how you can support me is - Go watch some of my other videos that I have linked here in these two cards. Thanks for watching, see you next time.