Daniel Crosslink, welcome back to the channel and the blog. In this article, I will show you how to upgrade the firmware on your Ender 3 v2.
Alternatively you may want to watch the video, embedded above.
In the last couple of weeks, I've extensively tested the Ender 3 v2 for print quality and long term results and if you've missed that review, I've linked it here for you to check it out.
In the Ender 3 v2 review video, I mentioned that I updated the firmware to the latest version from Creality.
Actually, I did this two times because Creality released new firmware versions during the test period.
Why should you keep your firmware up to date?
Well, mainly because especially in the beginning, when a printer is released, it may contain some bugs and new firmware will usually address those issues and sometimes a new firmware version will also add new features.
The following process not only applies to the official Creality firmware but also to custom firmware, like Marlin or Klipper or anything else.
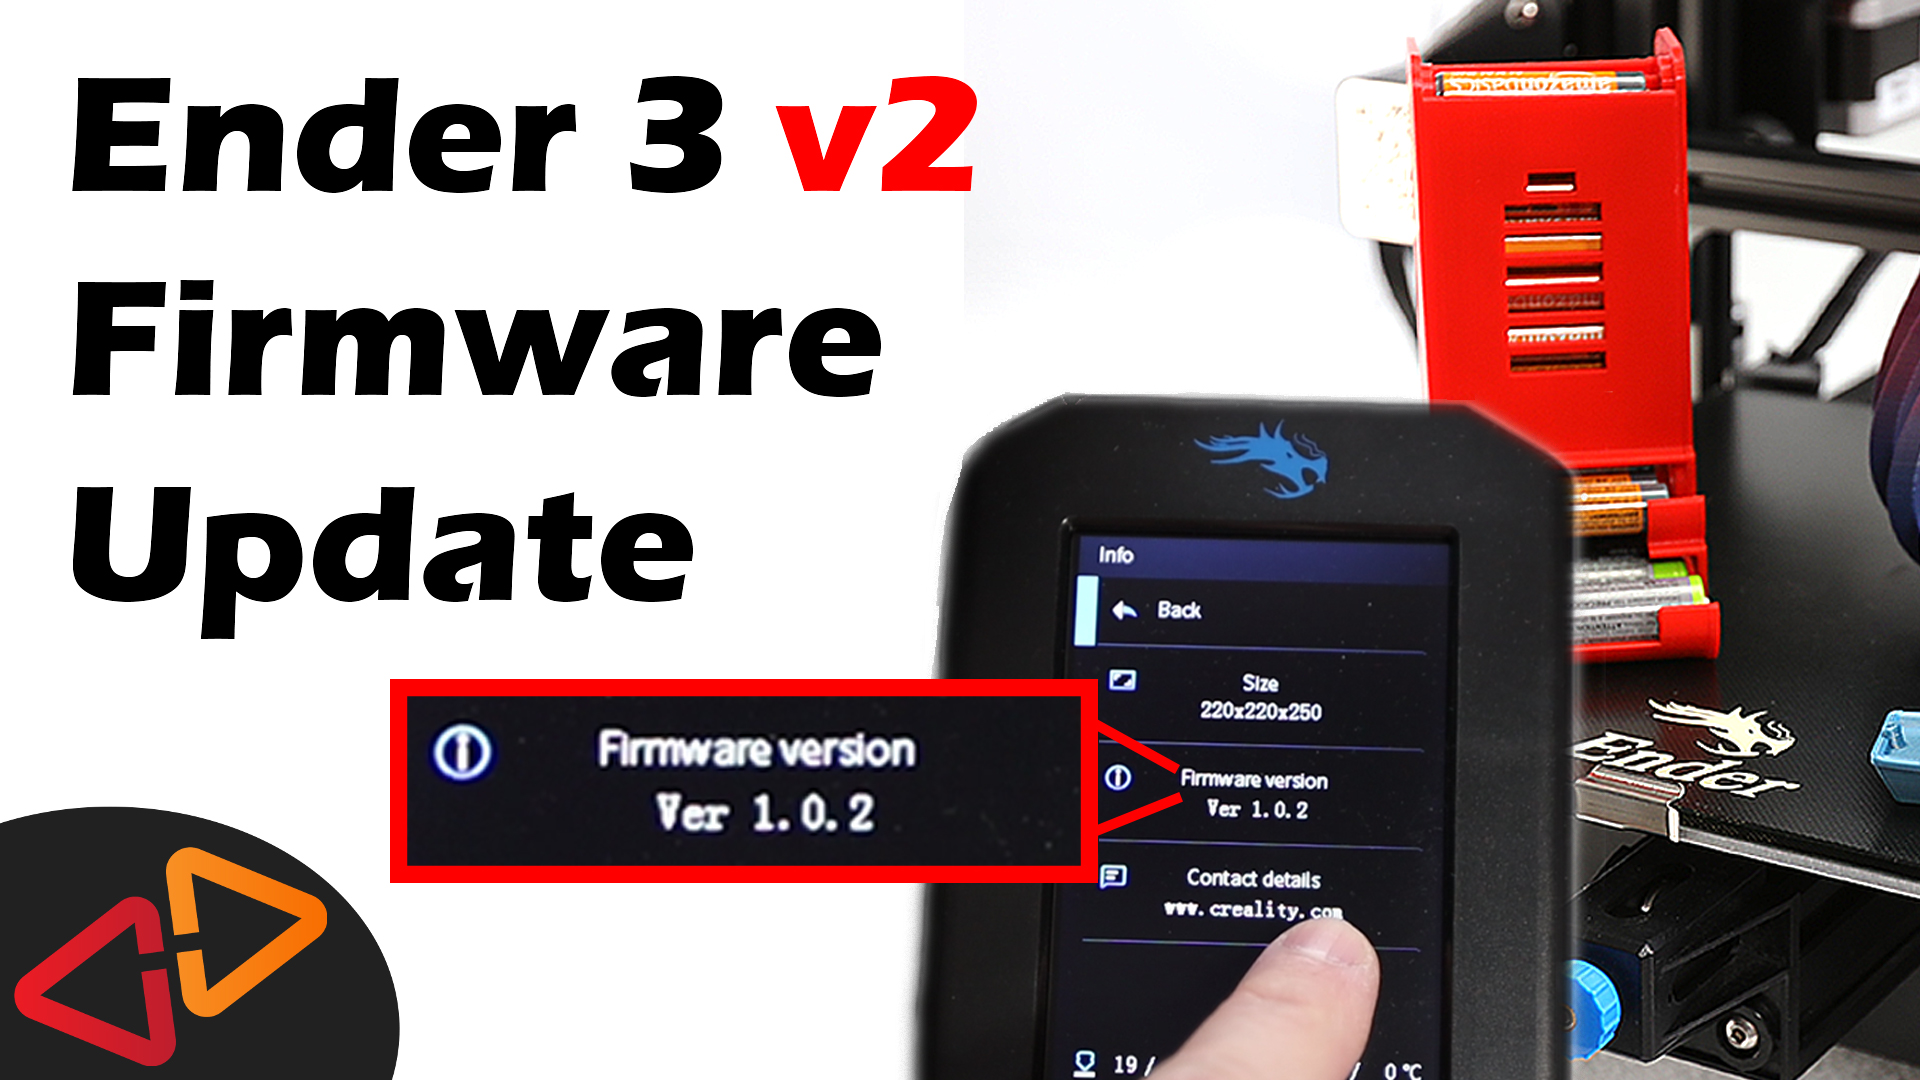
To figure if you should update, the first thing is to check the currently installed firmware version.

On the Ender 3 v2, this can be done in the printer menu, navigating to the Info screen, where you will find the current firmware version number.
Another thing you need to know is, which mainboard version your printer has.
Apparently, Creality released Ender 3 v2 models with a 4.2.2 mainboard and newer builds may have the 4.2.7 mainboard.
Why is this important? These two mainboard versions have different stepper motor drivers and require a different firmware.
To check, which mainboard version you have, there is no other way as to open up the electronics case and have a look at the mainboard itself.


To do this, release the one screw on top of the electronics case and the three screws at the bottom.
If you do this for the first time, those screws might be bolted very firmly, so make sure you use the hex driver with the long end as leverage.


Here on the left image you see, my printer has the 4.2.2 mainboard and this on the right is how the 4.2.7 looks like. They look identical except for the version number.
Now that we know the mainboard version, let's head over to the creality3dofficial.com website. Head over to the support section and select "Firmware Download".
Select the Ender series and then the Ender 3 v2.

Here you see, there is different firmware versions for the different mainboards. In my case, I would have to select one of the 4.2.2 firmware builds and if you have the 4.2.7, you would select one of these other builds.
The selection depends whether you have a BLTouch in combination with that mainboard or not. We're going to talk about the BLTouch installation in another video.
Now, we download the right firmware and what we get from the Creality website is a RAR file, which is similar to a zip file but windows cannot handle it unless you install something like winrar or 7-zip, which is what I'm using.
I've also linked to the official 7-zip download page here.

Using 7-zip, I am extracting the file to the current folder by right clicking the file and then selecting 7-zip → extract here.

In the new subfolder starting with "Ender-3 v2" you will find two subfolders for firmware. One is for updating the screen and one for the mainboard.
Yes, you hear me right, there is different firmware for the screen and the mainboard.
From the official guides it says, always update the screen before the mainboard, so this exactly what we're going to do now.

Insert your SD card to your PC and Copy the DWIN_SET folder to the SD card. Make sure that your SD card is not larger than 32 gigabytes, because the mainboard otherwise might not support reading it.

Power off the printer now and disconnect the display cable from the display.


Open the display case by removing the screws on the back.

Now, take the SD card and insert it into the screen's SD card slot.

Reconnect the display cable and power on the printer.

Wait until the screen turns red, then power off the printer and remove the SD card from the display.

Power the printer on once more and wait until the printer is fully started and shows the main menu.
If everything looks fine, power the printer off.

Close the display cover and remount the display.

From the mainboard folder, copy the file starting with "Ender-3 v2" and ending with "bin" to the SD card.
Now one little remark that I need to make here. If you already flashed this particular firmware to the printer and for any reason you like to re-flash the same bin file again to the printer, you need to rename it before you do this.
So because, I already have flashed this firmware version but I still want to re-flash it to show you the process, I am renaming it to some other name, ending with bin and I should be fine.
Now we insert the SD card back into the printer and turn it off and back on.

The new firmware gets flashed to the mainboard and as soon as the display shows the menu screen again, you're done.
Double check in the Info menu that the expected firmware version is shown.
If you run into the issue of a black screen after doing this or the printer starts beeping continously, you somehow missed one of the steps or mistakenly tried to flash a wrong version of the firmware to your mainboard.
In that case, don't panic but first re-flash the screen firmware and then repeat the process for the mainboard firmware.
That's it about how to flash Creality's firmware to the Ender 3 v2.
If you liked this article and video, you're probably also interested to watch my initial build video, the timelapses and the Ender 3 v2 review after 150h of printing here:
Ender 3 v2 build and comparison to v1 and Pro: https://youtu.be/yTa79F8Jwfs
Ender 3 v2 timelapses: https://youtu.be/36V-WFQfs7E
Ender 3 v2 detailed review after 150h of printing: https://youtu.be/I6LHam6m3g4
THE PRINTERS I USE: https://kit.co/danielcrosslink/the-3d-printers-i-use
MY MERCH: https://www2.crosslink.io/shop
BECOME A PATRON: https://www.patreon.com/crosslink
CHAT ON DISCORD: https://discord.gg/ne3J4Rf
BUSINESS INQUIRIES ONLY (OR IF YOU WANT TO SEND SOMETHING) - DANIEL@CROSSLINK.IO
FOLLOW ME:
INSTAGRAM - https://instagram.com/danielcrosslink
TWITTER - https://twitter.com/danielcrosslink
FACEBOOK - https://facebook.com/danielcrosslink
WEBSITE: https://www2.crosslink.io
The Music I use: https://www2.crosslink.io/es, AMAZING for YouTubers!
GEAR USED
https://kit.co/danielcrosslink/my-video-gear
Disclaimer: As an Amazon Associate I earn from qualifying purchases.