Daniel Crosslink, welcome back to another guide. In this post, I'll talk about how to upgrade your Ender 3 v2 to the latest Marlin firmware.
So in the last video and article, I talked already about how to install the latest Creality firmware on the Ender 3 v2.
I can highly recommend to watch that video or read the article because they explain explain in detail how the general firmware installation process works.
We're going to touch those steps today as well, but just briefly, because this guide is more focused on the Marlin part.
To start off, you should have setup your computer already to be ready to build Marlin firmware.
There is a series of videos about this topic, that I've linked for you here.
So as every time when we build Marlin firmware for a new printer, we'll download the latest release version of Marlin firmware from the Marlin github homepage.
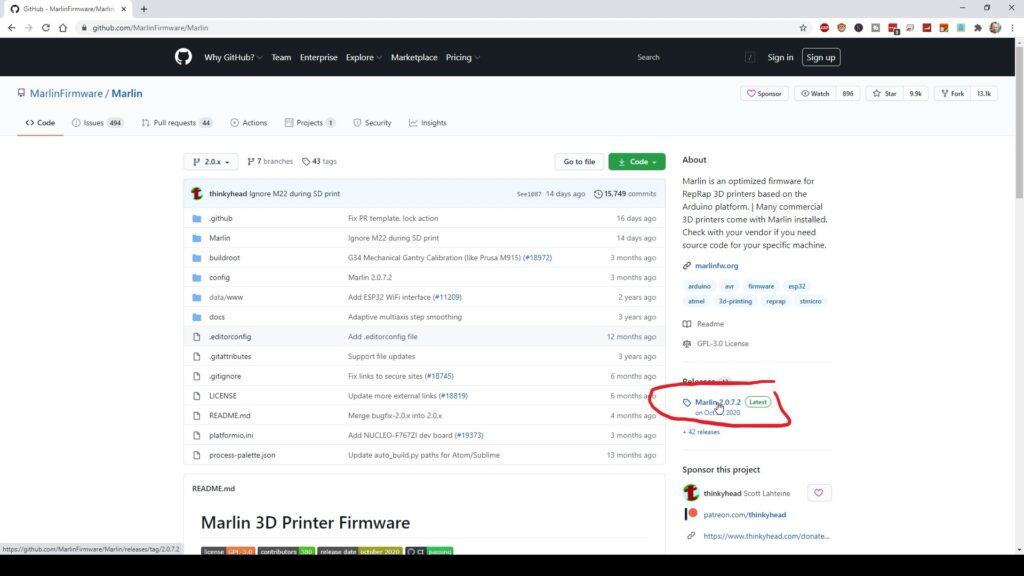
Here on the github page on the right hand side you'll find a link to that latest release.
Scroll down until you find the zip file link and download that file to your computer.
After unzippping that file, you'll have a new Marlin 2.0 folder ending with the version number.
Inside there will be a config folder.
Look inside that config folder and open the readme.md file.
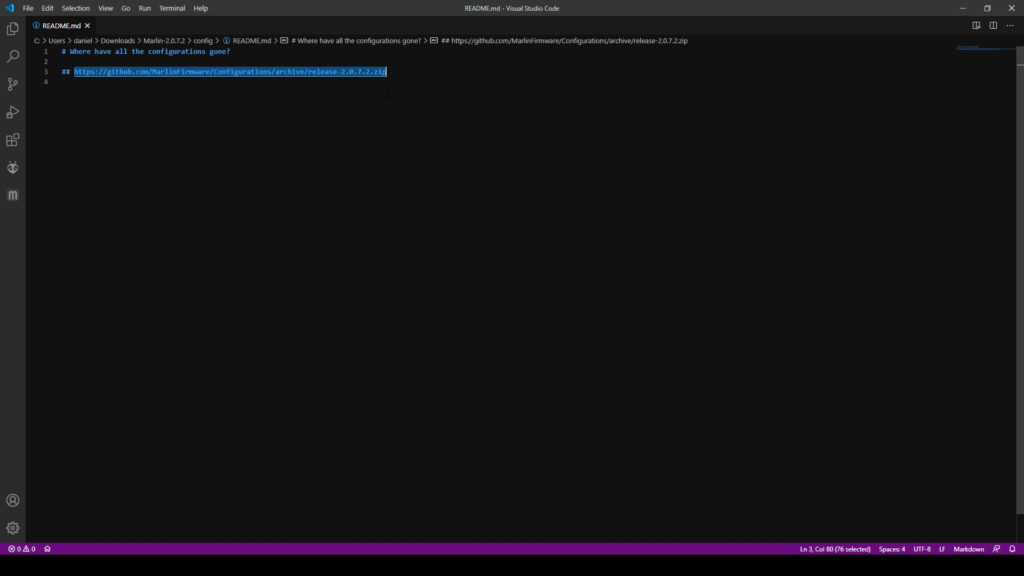
That file will contain a download link for the configuration examples for that specific release version of Marlin.
Copy that link to your browser address bar and download that zip file to your computer.
Unpack the zip file and you'll find also a config folder, which has the examples subfolder.
Inside of that examples folder, you'll find all the manufacturers and there you locate the Creality subfolder.
Inside, change to the Ender 3 v2 folder.
First of all, you'll have to copy the DWIN_SET folder as it is to an SD card to flash the latest display firmware to the Ender 3 v2's display.
That is because the Ender 3 v2's display has it's own firmware and needs to be in sync with the printer firmware.
Update the screen's firmware as I've shown it in my previous firmware update video by opening the display back cover and using the screen's SD card slot to flash the screen firmware.
So we did part 1 of the upgrade, the display firmware. Let's finish part 2, the printer mainboard firmware.

Head back to the Ender-3 v2 configuration folder and copy all files with the .h extension into the Marlin subfolder of the directory, where the Marlin github sourcefiles are.
Don't copy those config files in to the main directory, that won't work, really make sure you put it in the Marlin subfolder.
A lot of people get this wrong and wonder why their firmware seems to build for the wrong printer and why they don't see the right environments showing up.
Having prepared that, let's now open Visual studio Code from that main directory. The easiest way to do this is to right click the whitespace in that folder and then click open with code.
But of course you can also just open visual studio code and then use the open folder menu from the side bar to open that folder by locating it on your computer.
If you're at this point of the video wondering about what is visual studio code and what the heck is Auto build Marlin, please hit that little button here in the corner and watch my explanation how to get your computer ready to compile Marlin firmware and then come back to this post.
So you should now have the Marlin 2.0 and whatever version folder open and now it's time to click that Auto build marlin button here on the side bar.
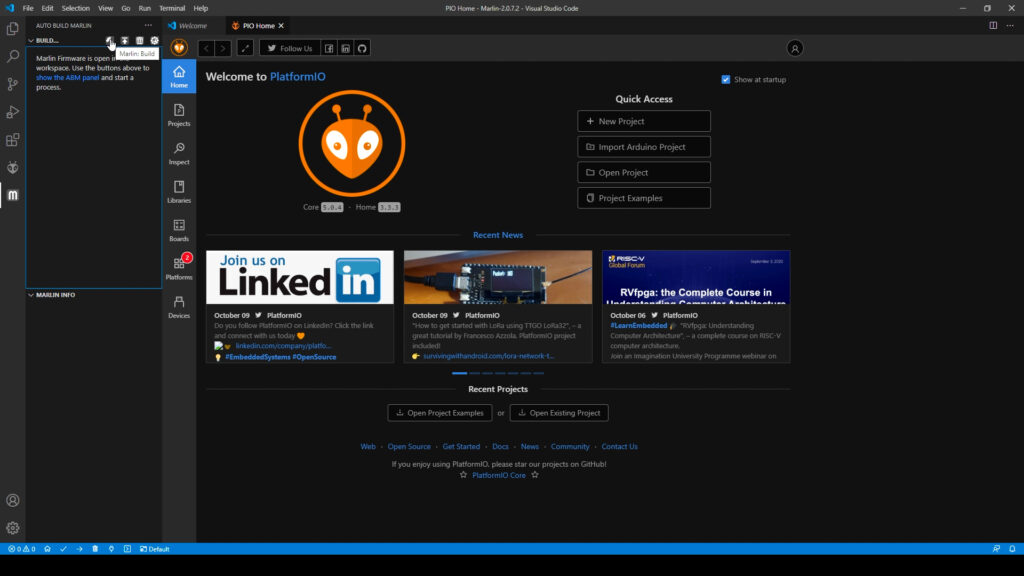
Then click the Marlin build button here at the top, it's going to appear as soon as you move your mouse cursor into that upper section of the panel.
The build process should now start and in the lower part of the Auto Build Marlin tab there should be the progress and after a while a SUCCESS message.
A little bit above those lines, you'll find a hint where to look for the firmware binary file.
In my case, it's telling me that the files are in the .pio\build\STM32...\ subfolder.
Head over to the explorer and locate that folder.
It is going to be a new subfolder in the Marlin sources directory. and then from there you can navigate down to the build and STM subfolder.
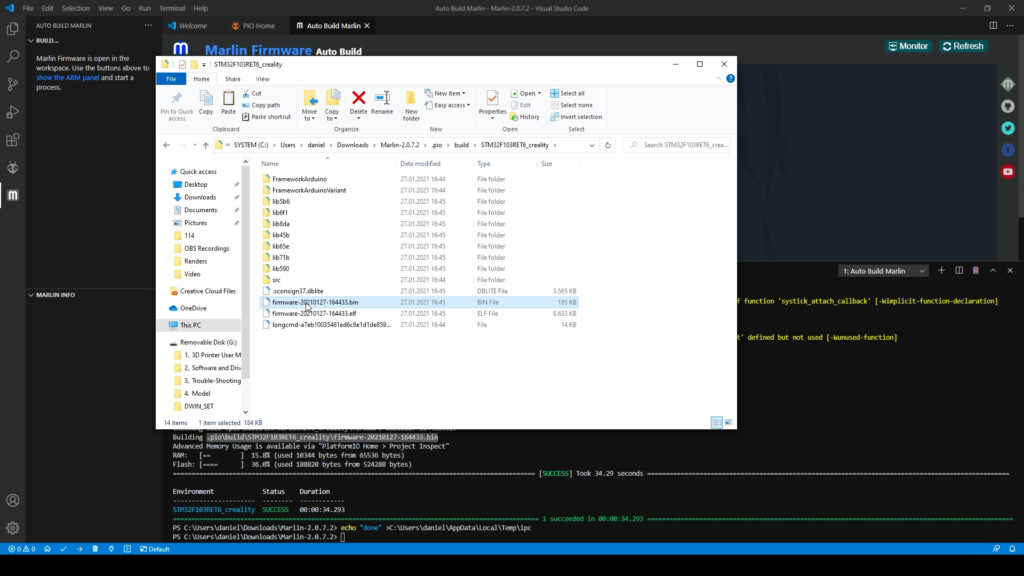
Depending on how often you did this already, every time you do a new build, there is going to be a new bin file ending with the date and time. I will pick the latest file, I've just built and copy that to the SD card to flash it to the printer.
Insert the SD card back into the printer, power it off and back on and the latest firmware should now be on the printer.
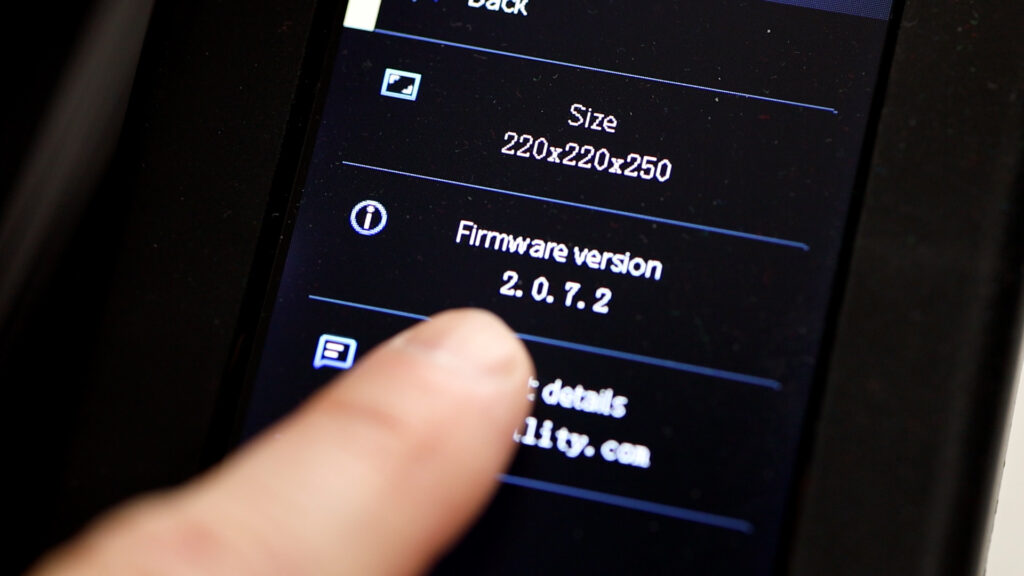
Double check the version by selecting the info menu of the printer and there it should show you the version that you've just built.
So far so good.
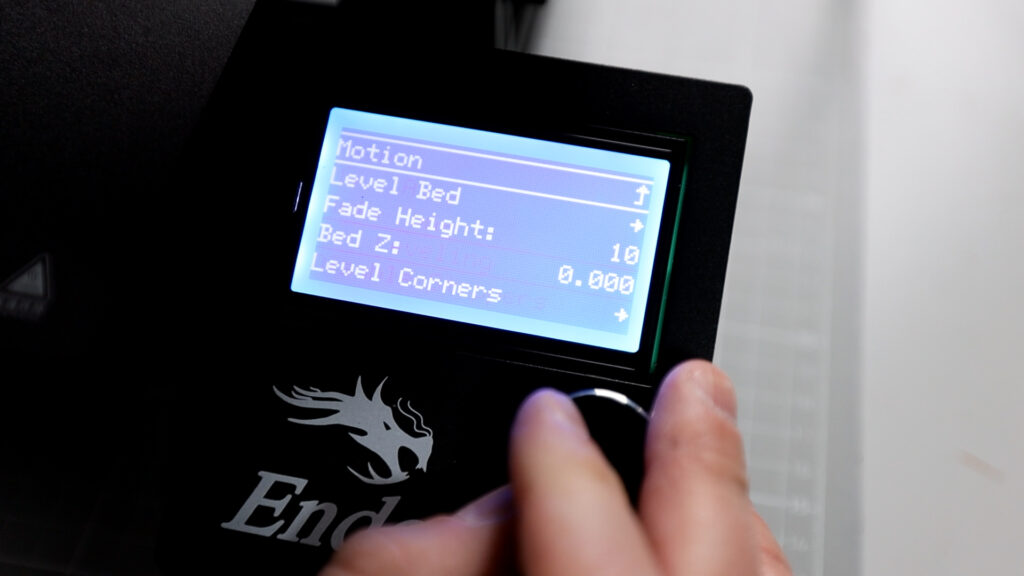
But we didn't change anything in the firmware yet to get some of the additional features that we might want. What about my favourite two features, LEVEL_BED_CORNERS and MESH_BED_LEVELING.
I am activating those two features in the Configuration.h file of marlin firmware alongside with the LCD_BED_LEVELING setting.
Let's just try to build the firmware with these three settings enabled.
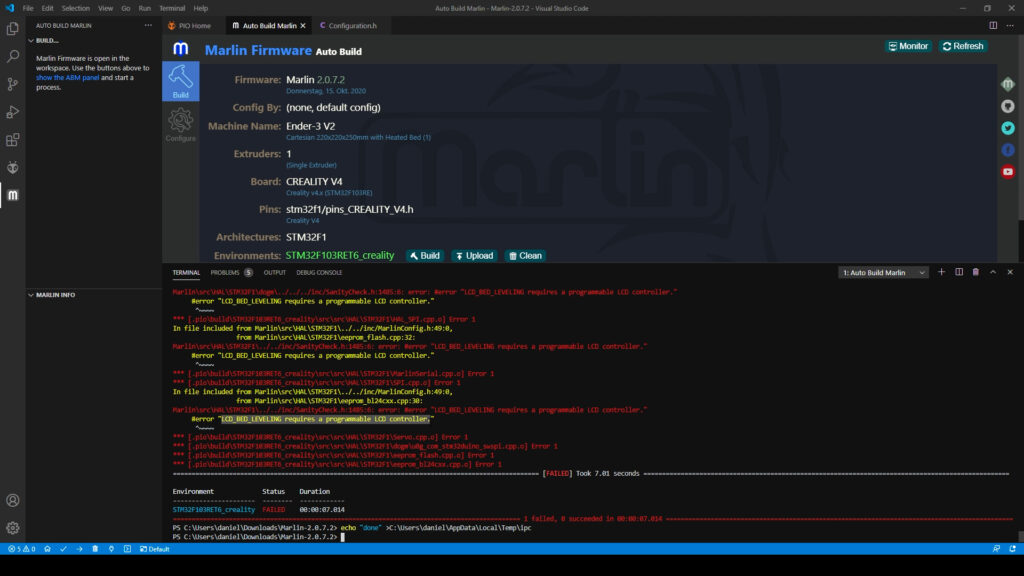
We're getting an error message telling us "LCD_BED_LEVELING" requires a programmable LCD controller".
Wait a moment, what does it mean?
Honestly, I first had to figure out how the Ender 2 v2 display and the Ender 3 v2 mainboard actually work together.
They apparently communicate with each other but not in the way I expected them to do.
When you think about how the previous 12864 LCD displays of the Ender 3 Pro and the v1 are driven solely by the mainboard - they are just being sent the bare pixel information.
The old 12864 display itself has no idea what is actually happening in terms of menu items or text. When you turn the knob and hit the button it also just sends back those signals to the mainboard, which then decides what to change on the screen or what to activate.
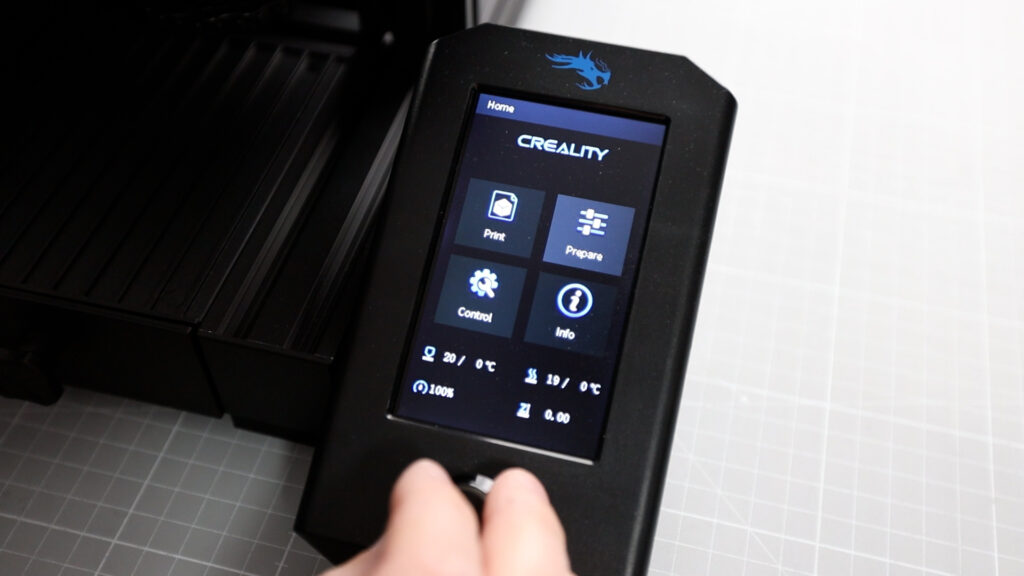
The Ender 3 v2 display is acting completely autonomous in that regard.
It has its own firmware with menu items and text and a program behind that which interacts with the user and then sends back some commands to the printer and gets some data from the printer to show.
But if the firmware on the printer mainboard likes to display another menu item that wasn't also programmed into that display firmware, it's just not there and it won't be there.
And because that firmware on the display isn't open source - yet at least - we can't just change that and adapt the display firmware to new features that we want to have shown on the screen's.
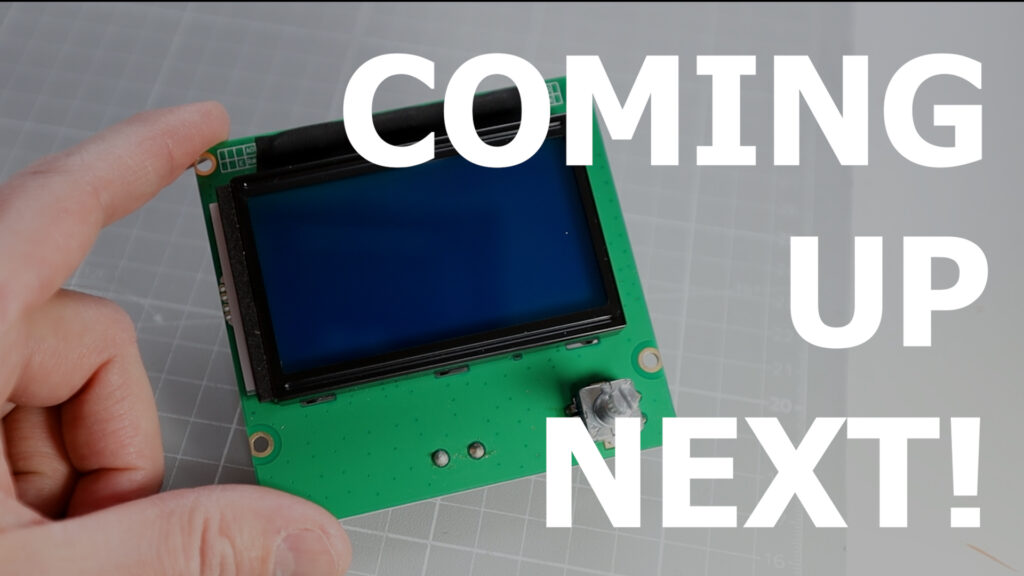
That is actually such a big disappointment that I am really strongly inclined to switch back to a good old 12864 display on this printer just to be able to get my features back.
So - in fact - I already decided to exactly do that in the next video, so watch that next, if you're interested in that mod.
I hope you've liked this guide and if so, consider subscribing to my YouTube channel and please give my videos a thumbs up so they get pushed out to more people. It's helping the channel! Thanks so much!
Bye!
🛒 Get the Ender 3 v2 here: https://geni.us/ender3v2
🛒 Upgrade your Ender 3 (Pro) to 32bit: https://geni.us/creality32bit
VIDEOS YOU SHOULD ALSO WATCH
Watch this, for details how to upgrade the firmware on your Ender 3 v2 mainboard and display: https://youtu.be/C3td3wGPM8g
How to prepare your computer to build Marlin firmware: https://youtu.be/0xXiYhXn8mQ
My detailed Ender 3 v2 review: https://youtu.be/I6LHam6m3g4
Watch the Ender 3 v2 build video: https://youtu.be/yTa79F8Jwfs
Awesome 3D printing timelapses on the Ender 2 v2: https://youtu.be/36V-WFQfs7E
Download the Marlin firmware sources here: https://github.com/MarlinFirmware/Marlin
THE PRINTERS I USE: https://kit.co/danielcrosslink/the-3d-printers-i-use
MY MERCH: https://www2.crosslink.io/shop
BECOME A PATRON: https://www.patreon.com/crosslink
CHAT ON DISCORD: https://discord.gg/ne3J4Rf
BUSINESS INQUIRIES ONLY (OR IF YOU WANT TO SEND SOMETHING) - DANIEL@CROSSLINK.IO
FOLLOW ME:
INSTAGRAM - https://instagram.com/danielcrosslink
TWITTER - https://twitter.com/danielcrosslink
FACEBOOK - https://facebook.com/danielcrosslink
WEBSITE: https://www2.crosslink.io
The Music I use: https://www2.crosslink.io/es, AMAZING for YouTubers!
GEAR USED
https://kit.co/danielcrosslink/my-video-gear
Disclaimer: As an Amazon Associate I earn from qualifying purchases.